Setup webpack for TypeScript and SASS Manually
25/02/2022 • 9 min read
Introduction
By the end of this guide, you will have a project that you can customize its inner workings anytime. Even if you don't want to customize it, you will learn how does the module bundling work in action.
What could this bring to you?
- You won't have to eject to customize your bundling
- You can make your features such as making the routing similar to Next.js
- Broader debugging opportunities
Here is what we are going to do:
- Configure webpack for the minimum project
- Put HTML, CSS and JS Together
- Prepare webpack for Development
- Setup TypeScript
- Configure SASS
- What to do next?
Final project repository on GitHub: BerkeKaragoz/berkekaragoz-webpack-post
Preparing the Initial Project
We create a default npm project in our folder: npm init -y
We will have a package.json file that looks like this:
{
  "name": "berkekaragoz-webpack-scss",
  "version": "1.0.0",
  "description": "",
  "main": "index.js", "comment": "<-delete the main"
  "scripts": {
    "test": "echo \"Error: no test specified\" && exit 1"
  },
  "keywords": [],
  "author": "",
  "license": "ISC"
}
We are deleting the main entry since webpack is going to tell that.
Now we will create the other project files according to the following tree:
dist/
node_modules/ //already created
src/
 ├───index.css
 ├───index.html
 ├───index.js
 └───sample.jpg // or any image
You can fill them as you wish, here are the contents of what I did.
index.css:
html {
   background-color: #333;
   color: aliceblue;
}
index.html, create one with the emmet snippet !:
<!DOCTYPE html>
<html lang="en">
   <head>
      <meta charset="UTF-8" />
      <meta http-equiv="X-UA-Compatible" content="IE=edge" />
      <meta name="viewport" content="width=device-width, initial-scale=1.0" />
      <title>Document</title>
   </head>
   <body></body>
</html>
index.js:
console.log("I didn't watch Star Wars.")
sample.jpg: A link of my recent photo
Configuring webpack For the Initial Project
Install webpack and its CLI as a dev dependency:
npm i -D webpack webpack-cli
Create the webpack.config.js under the root of the project folder. And don't forget to read the comments.
const path = require("path")

ENTRY_PATH = path.resolve(__dirname, "src/index")
DIST_PATH = path.resolve(__dirname, "dist")

module.exports = {
   mode: "development", // or production
   entry: {
      // remember that we deleted the main in package.json
      // this is where the project starts
      main: ENTRY_PATH,
   },
   output: {
      // this is where the bundled packages go
      path: DIST_PATH,
      // [name] is the name of the file and
      // [contenthash] is the hash of the bundle
      filename: "[name].[contenthash].js",
      clean: true, // remove existing previous bundles
   },
   //later
   module: {},
   plugins: [],
}
Add the build command to the package.json under scripts:
{
   "scripts": {
      "test": "...",
      "build": "webpack"
   }
}
Run the build command: npm run build
And you will see that your code will be bundled under the dist/ folder: main.7487bec281371ef08592.js
You can run this with node: node ./dist/main.7487bec281371ef08592.js
The output: I didn't watch Star Wars.
This means that it works perfectly for what we have configured. It only bundles the JS at this time.
HTML, CSS and JS Together
Now we have to bundle HTML and CSS with that.
HTML
Install html-webpack-plugin to help us bundle HTML:
npm i -D html-webpack-plugin
Import the plugin in webpack.config.js:
// const path = require("path");
const HtmlWebpackPlugin = require("html-webpack-plugin");

//... under module.exports
  plugins: [
    new HtmlWebpackPlugin({
      filename: "index.html", // output
      // the one which we have created
      template: path.resolve(__dirname, "src/index.html"),
    }),
  ],
Ensure that your project works by building it. When you open the bundled dist/index.html and open the console, you will see the JS output in there.
CSS
Now we have to setup loaders. These loaders import the assets such as CSS, SCSS as well as images and others things like TS. Those come in handy when dealing with parsing/compilation situations.
We will install two loaders: npm i -D style-loader css-loader
The css-loader will get the CSS file and passes it to the JS file. The style-loader will get the CSS file from the JS file and will pass that to the HTML.
We will set those up in the module in webpack.config.js:
module: {
  rules: [{ test: /\.css$/, use: ["style-loader", "css-loader"] }], // have to be inorder
},
Import the CSS file to index.js:
import "./index.css"
//console.log("I didn't watch Star Wars.");
And when you build and open the bundled HTML file, you will see that the background will be gray (#333). This means that the setup is successful.
Assets
Now we will add resources such as images. For this, we need to add another rule in the webpack.config.js:
rules: [
//...
  { test: /\.(jpg|jpeg|png|svg|ico|webp|gif)$/, type: "asset/resource" },
]
// And if you want to provide a name template
// add the following under the `output`:
  assetModuleFilename: "[name]-[contenthash][ext]",
We will test this later on, but it's probably okay. This is for using assets directly in our code.
Most of the time you will be using your public/ folder to access resources. This way, you will be able to switch to a CDN in production.
We make a public/ folder and copy its contents into the build folder dist/.
To do this we will install a copying plugin: npm i -D copy-webpack-plugin
The configuration is pretty straightforward, webpack.config.js:
const CopyPlugin = require("copy-webpack-plugin");
// Create the path of the static folder as public
PUBLIC_PATH = path.resolve(__dirname, "public");
// Under module.exports:
  plugins: [ //...
    new CopyPlugin({
      patterns: [{ from: PUBLIC_PATH, to: DIST_PATH }],
    }),
  ],
Now if you put the sample.jpg into the public/ folder, you will be able to access it with the /sample.jpg url. You will see the image in the dist/ if you build your application.
Configuring webpack for Development
Now we are successfully bundling our code. We have to make the development easier. In the end, we wouldn't want to build every time we want to test our code.
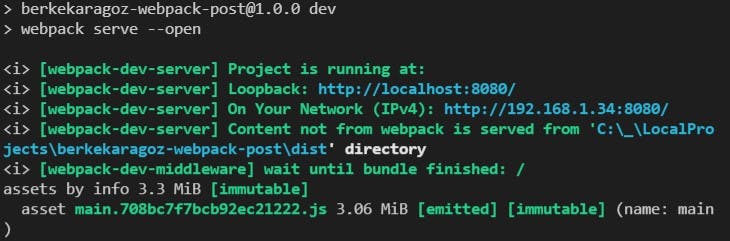
We will install the development server: npm i -D webpack-dev-server
Add the script to run the server to the package.json:
{
   "scripts": {
      "dev": "webpack serve --open",
      "build": "..."
   }
}
The --open option is if you want to open your default browser when the server is ready to serve.
With this, we will be accessing our project from the memory instead of the disk.
Now we can configure more options in webpack.config.js:
  plugins: [
    //...
  ],
  devtool: "inline-source-map", //for tracing
  devServer: {
    // so that it can watch for other changes
    static: DIST_PATH,
    hot: true, // hot reload, save to refresh
  },
Notice the devtool, that is how we can know where the bundles come from. This way we can trace and debug possible errors or bugs.
Now you can run npm run dev to develop properly.
Setup TypeScript
First, we install TypeScript and its loader: npm i -D typescipt ts-loader
Create the tsconfig.json file:
{
  "compilerOptions": {
    "outDir": "./dist/",
    "noImplicitAny": true,
    "module": "es6",
    "target": "es5",
    "jsx": "react",
    "sourceMap": true,
    "allowJs": true,
    "moduleResolution": "node",
    // generate default imports if they don't exist
    "allowSyntheticDefaultImports": true,
    "esModuleInterop": true
  },
  // our project shouldn't touch these
  "exclude": ["node_modules", "**/*.spec.ts", "**/*.test.ts"],
  // look only for the following
  "include": ["src", "index.d.ts"]
}
Configure ts-loader in webpack.config.js:
  rules: [ //...
    {
      test: /\.tsx?$/,
      use: 'ts-loader',
      exclude: /node_modules/,
    },
  ],
  //...
  module: {/*...*/},
  resolve: { // works like autocomplete for imports
    extensions: ['.tsx', '.ts', '.js'],
  },
Change src/index.js to src/index.ts and test it out:
import "./index.css"

let myVar: number
myVar = 1
console.log("myVar is", myVar)
You should see the output.
There is one more step to complete the TS setup. The resources will not work anymore in our code. Because we have to declare modules for them. Let's do that after configuring React so that we can see that in action.
Configuring React
Let's get into rendering components with React. You can also use a different library.
Install React: npm i react react-dom @types/react @types/react-dom
Firstly, let's create our component at src/App.tsx:
import React from "react"
//import sampleImg from "./sample.jpg";
import "./index.scss"

export const App: React.FC = () => {
   return (
      <div>
         <h1>BerkeKaragoz webpack Post</h1>
      </div>
   )
}

export default App
Now we have to render it somehow. But React requires a div to start on. So we modify our src/index.html file:
<body>
   <!-- div#__react -->
   <div id="__react"></div>
</body>
We will select that div with its id and mount the App.tsx to it in index.ts:
import React from "react"
import ReactDOM from "react-dom"
import App from "./App"

ReactDOM.render(React.createElement(App), document.getElementById("__react"))
Notice that you cannot call the App with JSX notation. Because index file has .ts extension instead of .tsx. You can configure that on your own if you want to. But for this article, I will continue.
When you run your app, you will see the heading in the document with the proper colors in the index.css file.
Assets, again
Now while you can access the resources under public/ folder, you will get an error if you try to import your asset to your code directly. That happens because we have to declare them as modules for TypeScript at the root as index.d.ts:
declare module "*.jpg"
declare module "*.jpeg"
declare module "*.png"
declare module "*.svg"
declare module "*.ico"
declare module "*.webp"
declare module "*.gif"
Remember that we had included this file in tsconfig.json before. That's how it gets into our project.
Test it out in App.tsx:
import sampleImg from "./sample.jpg";
//...
  <img src={"/sample.jpg"} alt="sample" />
  <img src={sampleImg} alt="sample" />
Now both of the images should be in your document. If it works and your IDE shows an error, restart it.
Configuring SASS
First, we install SASS and its loader like we did before. Since SASS works like TS, it compiles its files to CSS, we will also install them as dev dependencies: npm i -D sass sass-loader
Setup the loader process in webpack.config.js:
  rules: [ //...
    {
      test: /\.s[ac]ss$/,
      use: ["style-loader", "css-loader", "sass-loader"],
    },
  ],
As I have explained, sass-loader passes its output to the css-loader. The rest is the same with CSS.
And since they are also seen as resources, we have to declare them as modules too in index.d.ts:
//...
declare module "*.scss"
declare module "*.sass"
We can test it out with a normal file, but let's use CS modules. Lets create App.module.scss:
$maxWidth: 512px;

.image {
   max-width: $maxWidth;
   height: $maxWidth * 0.5;
   object-fit: cover;
}
And apply the class to our images in App.tsx:
import style from "./App.module.scss";
//...
<img src={"/sample.jpg"} alt="sample" className={style.image} />
<img src={sampleImg} alt="sample" className={style.image} />
You will see that the images will be resized.

Final
Now you have built a project from scratch with webpack that you can use TypeScript and SCSS in it!
Where to?
You should optimize this process by making use of caching and optimization options.
"Setup webpack for TypeScript and SASS Manually", 25/02/2022, 10:11:00
#guide, #react, #sass, #typescript, #web-development, #webpack